Learning how to give yourself an intramuscular (IM) injection can feel intimidating at first, but with the right guidance, it’s easier than you think. At Olympia Pharmacy, we provide simple, step-by-step instructions to help you feel confident and in control.
This page includes a full video demonstration on how to give a intramuscular injection, detailed written directions, tips on choosing the right IM injection sites, and answers to the most common questions about giving injections at home.
Instructional Video: How to Self-Administer an IM Injection
Watch as Dr. Kate Campbell, Director of Pharmacy at Olympia Pharmacy, shows you how to give yourself an intramuscular injection.
How to Give Yourself an Intramuscular Injection: Step-by-Step Guide
Step 1: Inspect Your Medication and Supplies
Before anything else, make sure you’ve received everything you need:
✔ Medication vial with prescription label
✔ Syringe and needle
✔ Alcohol swabs
✔ Sharps disposal container
Check your vial label for storage instructions, expiration date and fill volume. If you have any questions or concerns, contact Olympia Pharmacy or your physician before use.
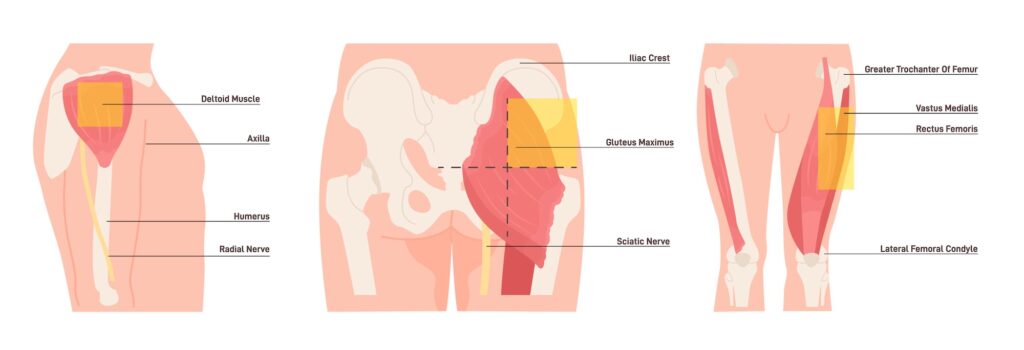
Step 2: Identify the Correct Intramuscular Injection Site
You have three main IM injection sites:
✔ Upper Arm: 2–3 finger widths below the shoulder bone in the deltoid muscle
✔ Thigh: Top or outer side of the femur area
✔ Buttock: Upper outer quadrant of the gluteus maximus
If your provider has given specific instructions for which site to use, follow their guidance.
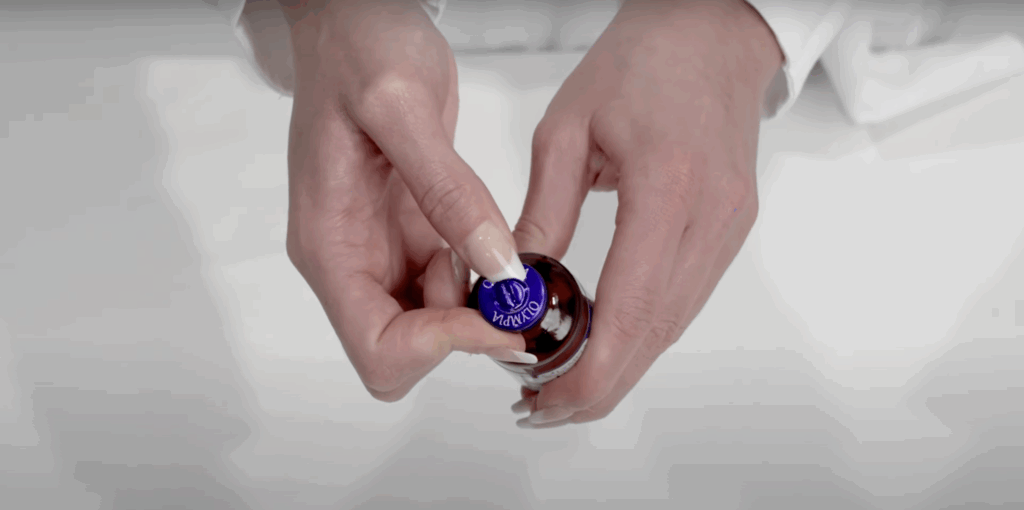
Step 3: Open the Vial
If you’re using your vial for the first time, begin by locating the small perforated ring in the center of the metal cap. Use your fingernail to peel back and remove only the inner foil ring, leaving the metal cap in place.
Once the rubber stopper is exposed, wipe it thoroughly with a fresh alcohol swab to sanitize the surface.
Next, attach a sterile needle to your syringe if it’s not already pre-attached. Hold the vial upright and insert the needle straight through the center of the rubber stopper.
Keeping the vial at a 90° angle, pull back the plunger to draw the correct amount of medication as prescribed by your provider.
Once you’ve drawn the dose, inspect the syringe for any air bubbles. If you see any, gently tap the syringe to bring the bubbles to the top, then push the plunger slightly to remove them before proceeding to the injection.
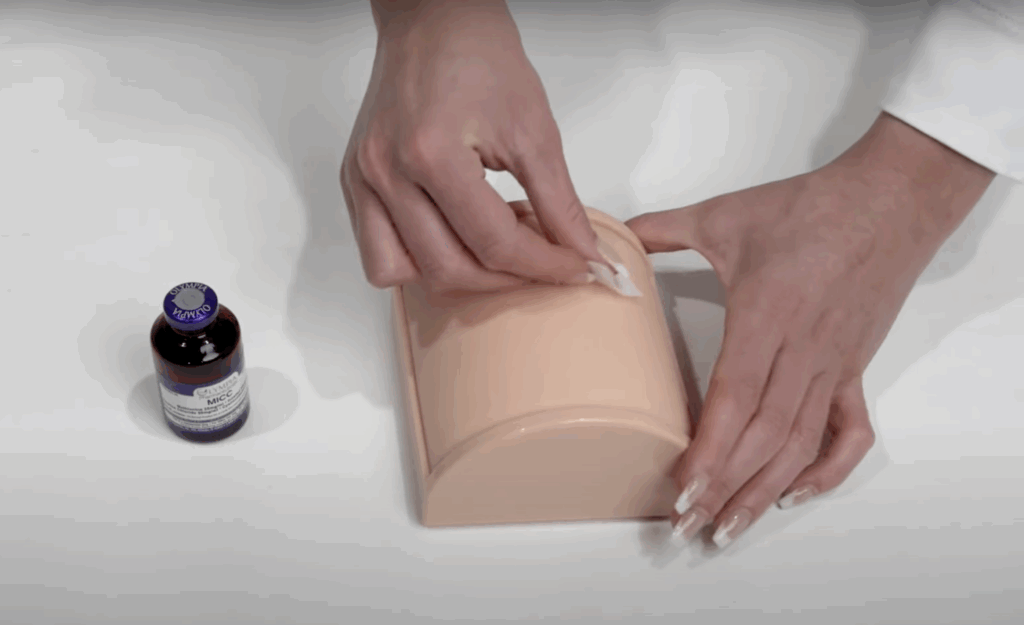
Step 5: Clean and Prepare the Injection Site
Sanitize the chosen intramuscular injection site with a fresh alcohol swab and let the area air dry completely. Then, with your non-dominant hand, gently pinch 1–2 inches of skin, avoiding the sanitized spot.
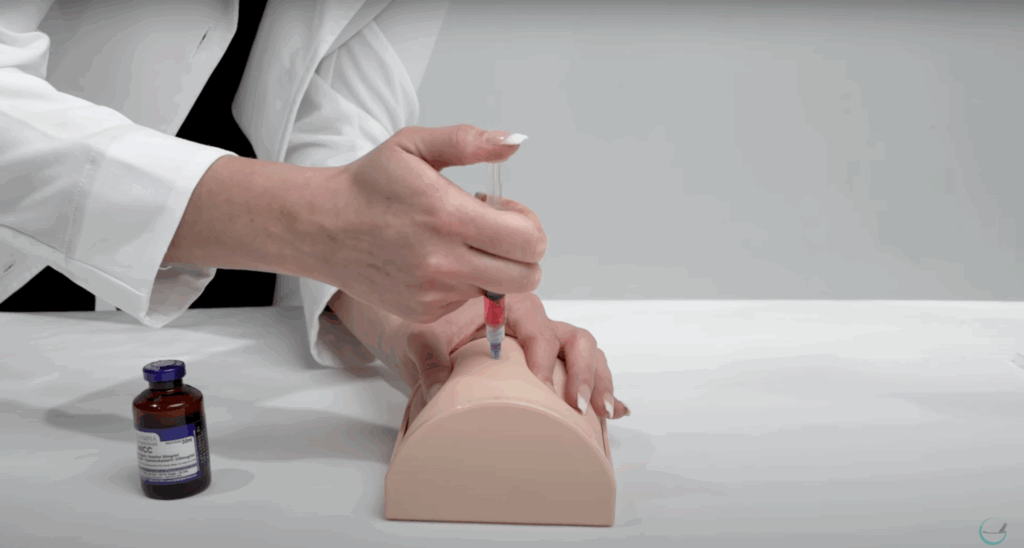
Step 6: Give the Intramuscular Injection
Hold the syringe in your dominant hand and insert the needle at a 90° angle using a smooth, continuous motion until it’s fully in. Once the needle is inserted, push down the plunger slowly until the entire dose is delivered.
Step 7: Remove and Dispose of the Needle
Withdraw the needle at the same angle you inserted it and massage the injection site gently. If you notice bleeding, apply light pressure with a clean swab for 1-2 minutes. Be sure to dispose of the used syringe and needle immediately in a sharps container.
Safe Needle Disposal Guidelines
Properly disposing of used needles, syringes and sharps is essential for your safety and the safety of others. Follow these steps to handle used injection materials responsibly:
Use a Sharps Container
Always place used needles and syringes in a FDA-cleared sharps disposal container. These containers are typically made of puncture-resistant plastic with a tight, leak-resistant lid.
Do Not:
• Do not throw loose needles in the trash or recycling bin
• Do not flush needles down the toilet
• Do not recap, bend or break used needles
What if I Don’t Have a Sharps Container?
If a proper container isn’t available, use a heavy-duty plastic container (like an empty laundry detergent bottle). It must be puncture-resistant, leak-proof and have a secure, screw-on lid. Be sure to clearly label it “Do Not Recycle – Sharps.”
Disposal Options
Once your sharps container is full, you have several safe disposal options. Many local pharmacies offer sharps disposal services, so check with yours first. You can also contact your local health department to find designated drop-off sites or community disposal programs in your area. In some cases, a mail-back sharps disposal service may be available and convenient for home use.
Q: What’s the difference between subcutaneous and intramuscular injections?
A: Subcutaneous (subQ) injections go into the fat layer under the skin, while intramuscular (IM) injections deliver medication directly into the muscle, where it can be absorbed into the bloodstream more quickly.
Q: What are the best IM injection sites for self-injection?
A: Three commonly used IM injection sites are the deltoid (upper arm), vastus lateralis (thigh) and gluteus maximus (buttock). Always follow your provider’s instructions if they recommend a specific site.
Q: Can I reuse syringes?
A: No. Always use a fresh syringe and needle to prevent infection and maintain medication potency.
Q: Do IM injections hurt?
You may feel a quick pinch or pressure as the needle enters the muscle. Some sites require more pressure than others. Relaxing the muscle and injecting with a steady, confident motion helps minimize discomfort.
Q: What if I hit a blood vessel or see bleeding?
A: Light bleeding may occur after giving an IM injection. Apply light pressure with a clean swab for 1–2 minutes. If you experience unusual pain, swelling,or persistent bleeding, contact your doctor.
Q: Can I reuse the same syringe or needle?
A: No. Always use a new, sterile syringe and needle for each injection to prevent infection and ensure accurate dosing.
Q: How do I know I gave the full dose?
A: Make sure the plunger is fully pressed down before removing the needle. The syringe should appear empty.
Q: What if I see air bubbles in the syringe?
A: Tiny air bubbles in subcutaneous injections are usually harmless, but you can gently tap the syringe and push the plunger slightly to remove air before injecting. Never try to remove large air pockets while the needle is inserted.
Q: How should I store my medication?
A: Always follow the storage instructions on your vial’s label. Many medications require refrigeration, but some may be stored at room temperature for a limited time. If you’re unsure, contact your pharmacist.
Still Need Help?
Whether you’re new to self-injections or just need a refresher, our pharmacists are here to help.